- Call us and get the best window tinting service
- (857) 247-0213
The Essential Guide To Cleaning 3M Window Film

How To Pick The Perfect Window Tint Percentage For Your Car
June 23, 2022
What are the different percentages of window tint and how to choose
July 15, 2022
Here’s how you should be cleaning 3M Window Film and how not to do it
Covering your windows with tints brings quite a few benefits for your home, office, and car.
That’s because besides giving your car that sophisticated look, tints also provide privacy, shield your vehicle against UV rays, absorb the heat, and so much more.
But for high performance, they need proper care. Here you’ll find a complete guide on how to clean your 3M window tints. Keep reading!

Products that can damage your tint
Many vehicle owners are so eager for squeaky clean tints that they end up cleaning 3M window film with products for home windows.
And though it might not seem like it at first, the signs that you are using the wrong products will begin showing up on your car. Your tints will wear out quicker, and the film will lose some of its original properties.
To help you avoid that trap, I’ve listed a few products you shouldn’t be using to clean and maintain your tints. Check it out!
Ammonia-based solutions
Ammonia-based cleaning products can cause the film to become brittle. Using these over time can cause the film to crack, and your tints won’t last very long.
Exposure to the sun might cause windows cleaned with ammonia-based solutions to fade. That will result in a faded film that is ineffective against UV rays.
Cloth, sponges, and other abrasive materials
Avoid cleaning supplies with rough surfaces! Cloths, sponges, paper towels, newspaper, etc. They may look harmless, but they have the potential to scratch your tint severely.
And believe me when I say these scratches are not just a minor detail. The dye will fade over time if you’re using these supplies.
Knives, scissors, and exacto knives
It goes without saying that knives, scissors, and Exacto knives can tear through tints and scratch your car windows. Many car owners insist on using these and other tools to break down bubbles in the film.
The safest, most effective way of getting rid of bubbles is to use a bank card. Hold the card vertically and use an end to push the bubbles towards the edges.
Follow these steps for cleaning your window tint
Step 1: wait for your tints to finish curing
Were your window tints recently applied? Respecting the curing time of the film is a must! Curing time can vary from 7 to 30 days.
Weather conditions affect the curing process directly, which makes for inconsistent curing time. Seasons with mild temperatures and low humidity are the ideal conditions for tints to adhere to windows.
Step 2: Clean and dry
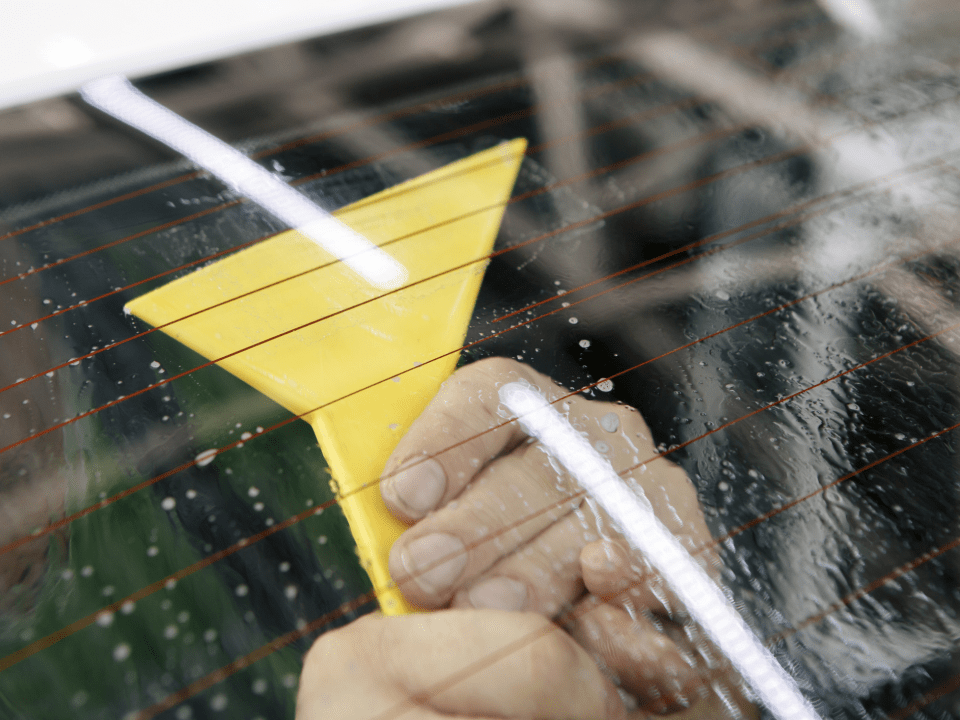
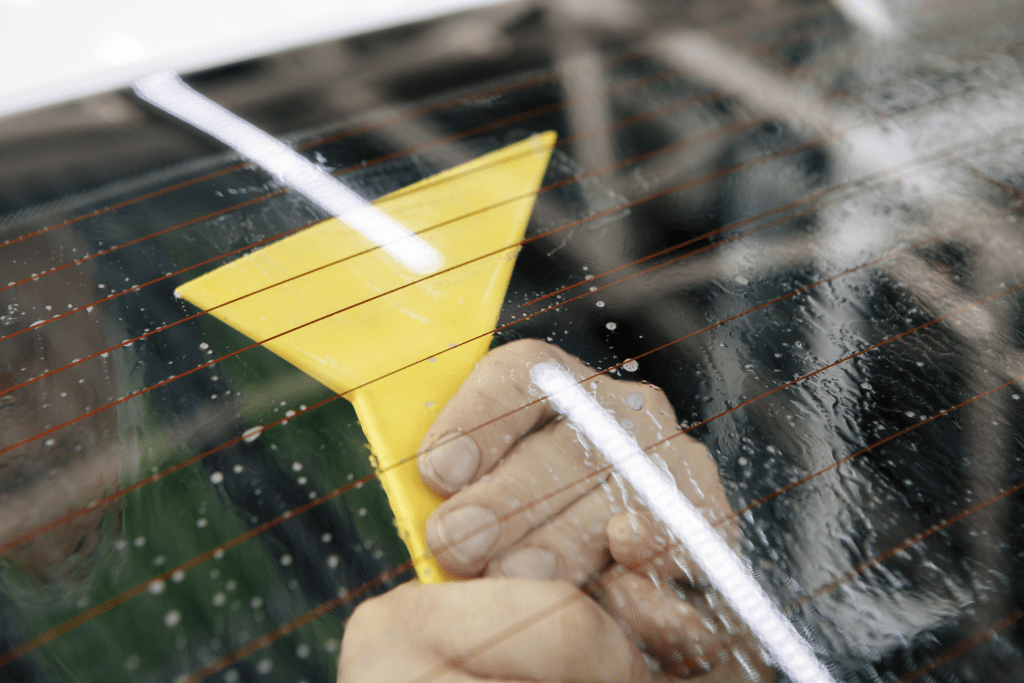
Are your tints done curing? Then it’s time to wash them! You can use a plastic squeegee or cotton cloth soaked in warm, soapy water.
Remember when we talked about harsh cleaning chemicals? Resist the urge to use them (especially ammonia-based solutions).
Once clean, dry the windows using a soft microfiber cloth. Here’s our tip for this part: dry the film with horizontal movements, starting from the top and working your way down, and rub the towel after each swipe.
Step 3: clean off any residue
Make sure to get rid of any residual dirt on the windows! Use a cotton cloth dampened with acetone to dry the film. It will remove any leftover residue without damaging your tints.
Want to learn more about window tints? Read our articles:


2 Comments
Keep up the great work! Thank you so much for sharing a great posts.
Willingly I accept. The question is interesting, I too will take part in discussion. I know, that together we can come to a right answer.